FRC-2020 Repository Documentation
The Infinite Recharge Robot


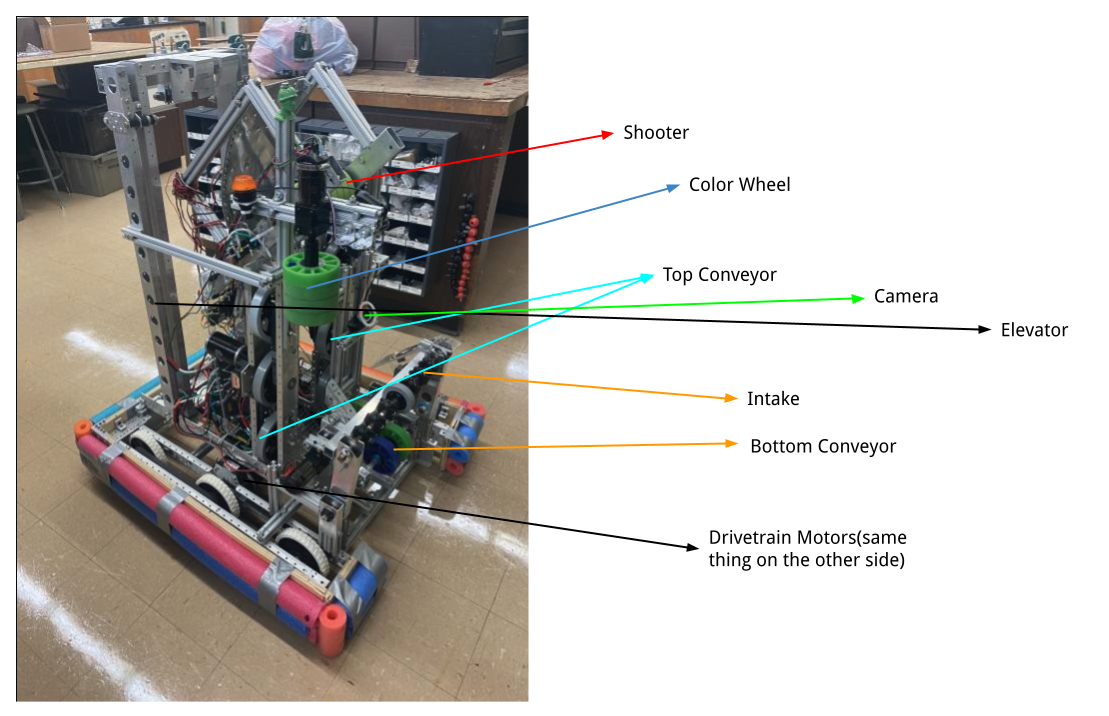
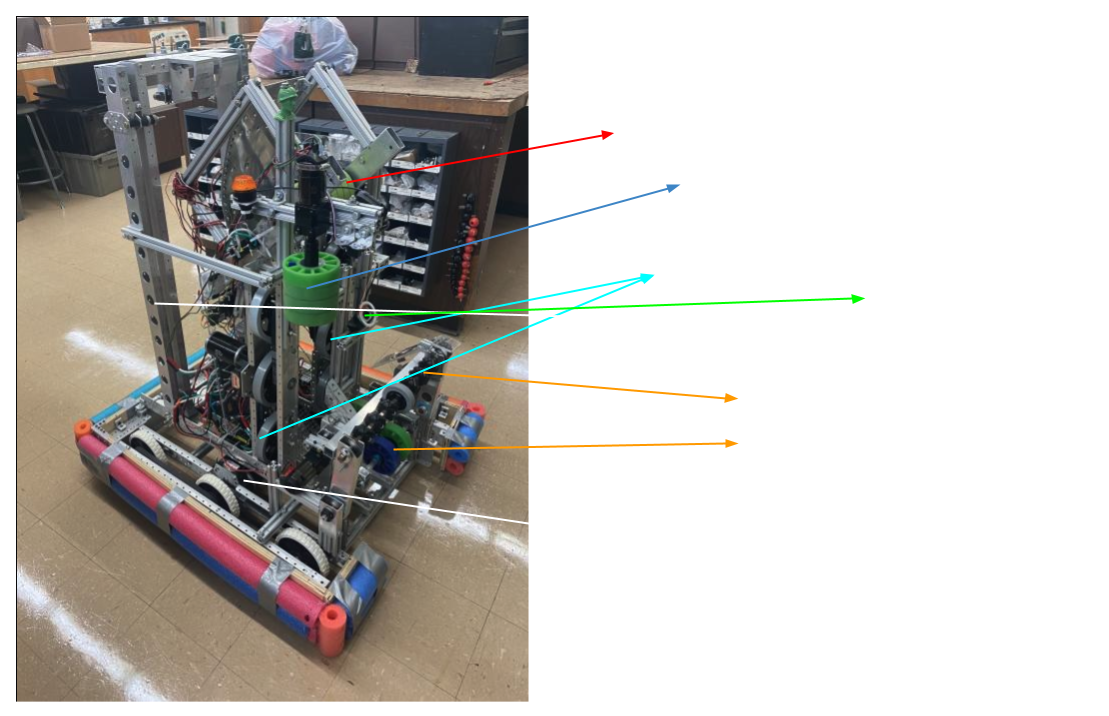
This is the robot we built for the Infinite Recharge challenge. Before reading this documentation, go look at the game animation for Infinite Recharge.
Introduction to the robot code
The goal of the robot code is to provide an easy way to control all of the motors on the robot and also run the motor autonomously. In order to accomplish this, we use the command-based architecture for the robot code. The code is made up of the following subsystems:
- DriveTrain
- Intake
- TopConveyor
- BottomConveyor
- Shooter
- Vision
- Elevator
- ColorWheel
They all are described in detail in the subsystems page.
In order to perform specific actions on each of the subsytems, we have commands, which are eventually bound to user input. In the repository, the commands are organized by subsystem. There are also some command groups, which are used to perform multiple commands in a certain order, either in parrallel or in series. All the commands are described in detail in the commands page.
Robot.java
Next up, Robot.java. Most of this file is also autogenerated, and it used to be useful before the new command based system. Now, however, it's just used for some basic initialization tasks and other miscellaneous stuff.
The robotInit() function is the first function that is called when the robot is started up. The first thing that is initialized is RobotContainer m_robotContainer. The RobotContainer class is defined in RobotContainer.java, which we will discuss later. For now, all you need to know is that all the driver input for the robot is defined in RobotContainer. The m_robotContainer object is defined at the start of the class.
The next line initializes the camera. This is not the vision camera, but rather the camera that is displayed to the driver on the driver station. Next, we set the camera resolution to 426x240. The camera is set to a low resolution because, during an FRC competition, we are only alloted a certain amount of bandwidth, and if we send a camera stream that is too high resolution, our camera connection might drop too much, making it harder to drive. We need to prioritize framerate over visual quality.
Next up is the robotPeriodic() function. This function is called every tick on the robot, no matter what mode the robot is set to(disabled, teleop, auto, test). Basically, it's a while loop. The function only has one line, CommandScheduler.getInstance().run(). In a command-baesd codebase, the command scheduler is responsible for reciving driver input and calling the commands as defined in RobotContainer, so with this line, we are telling the command scheduler to do whatever it's supossed to do every tick.
The next two functions are disabledInit() and disabledPeriodic(). disabledInit() is called when the robot is set disabled mode on the driver station and the periodic function is called every tick only when the robot is disabled. Note that all the robot modes are set in driver station. Both the functions are empty because we don't want anything to happen during disabled mode. Do note however, that the command scheduler, which is being run in robotPeriodic(), is still being called. The code in robotPeriodic() is always being run, no matter the mode.
Next comes autonomousInit() and autonomousPeriodic(). The init function checks the m_robotContainer to see if an autonomous command is set, and if the command is not null, it schedules it. Autonomous periodic is empty because there is nothing we need to do there. Everything is handled in whatever autonomous command is being run.
Next is teleopInit() and teleopPeriodic(). teleopInit() just cancels the autonomous command because we can use user input instead in the teleoperated section. There's a commented out resetGyro() call(the gyro is a sensor that tells us what angle we are currently at), and the reason it was commented out is because you don't know if the robot is pointing forward after autonomous. Also, we don't really need absolute gyro values in teleoperated mode anyways. The periodic function is empty because all the user input is handled by the scheduler, which is always being called by robotPeriodic().
Finally there's testInit() and testPeriodic(). We don't really use these, but all testInit() does is cancel all currently running commands, whatever they might be. More code can be added here for testing, and you don't need to worry about removing it because the test mode is never activated during an actual competition. This section could be useful for testing and debugging at a competition pit.
Constants.java
This file contains global constants to be used in all the other files. Everything from PID gains and other calibrated constants to controller button mappings are in this file. We are going to come across these constants when we go through the rest of the repository.
RobotContainer.java
Like described before, this is the file where all of the driver input from the controllers is handled. Normally, we have two controllers, 1 XBox-style(Logitech) gamepad and 1 Logitech Joystick. The joystick is assigned to m_driveJoystick and the gamepad is assigned to m_buttonJoystick. There are two drivers in a normal match, one of them using the gamepad and the other one using the joystick.
This class is also where all the subsystem objects are created.
In the first function, the constructor, you can see that the default command for the DriveTrain subsystem is set. All subsystems have a default command that runs continously in the background. For our purposes, we only have a default command on the drivetrain, which handles the driving of the robot. The DefaultDrive command is defined elsewhere, and it requires the following 4 parameters:
- the driveTrain subsystem object
- a function to get the value of the y axis(which is passed as an anonymous function, aka lambda expression, read more about anonymous functions here)
- a function to get the value of the x axis, which is also passed as a lambda expression
- a function to get if quickTurn should be enabled or not(this feature will be explained later when we take a look at the DefaultDrive command)
As you can see, all the inputs for the drivetrain come from m_driveJoystick.
Next, the configureButtonBindings() function is called, which is defined right after.
There's not really any technical reason to configure button bindings in a seperate function, but it is done anyways for neatness reasons. As you can see, the function is completely empty, and that is because the button bindings are slightly incomplete. However, you can see that there are a bunch of commented lines, and the reason for that is because we were testing the AutonomousShoot command. More about that command later in the commands page.
As for the rest of the commented lines, they just map buttons on a joystick to commands. The syntax is relatively simple.
First we initialize a joystick button object, new JoystickButton(m_driveJoystick, 4)
Then, we call the whileHeld() function of the newly created object, and as a parameter, we initialize and pass the command we want to run, like this: new JoystickButton(m_driveJoystick, 4).whileHeld(new TopConveyorIn()).
Finally, we pass the m_topConveyor subsystem object to the command, for the command to use, and we arrive at the complete line of code: new JoystickButton(m_driveJoystick, 4).whileHeld(new TopConveyorIn(m_topConveyor)).
The rest of the button bindings are configured the same way.
Finally, there's the getAutonomousCommand() function, which currently not implemented, so it returns null. Normally, this function is supossed to get the input from ShuffleBoard.
custom/SRXMagEncoder_Relative.java
Some context to what this file is and why it's needed: a rotary encoder measures how much a certain thing rotates. In this case, there's a rotary encoder on each side of the drivetrain to measure how much that side moved forward. This rotary encoder is connected to one of the Talon SRX motor controllers on that side of the drivetrain. SRXMagEncoder_Relative is a wrapper class I wrote to more easily get the data from the magnetic rotary encoder attached to the TalonSRX's on each side of the drivetrain.
It's constructor takes as input a TalonSRX type object. The TalonSRX class is imported from the libraries provided by the manufaturers of the TalonSRX, and not WPILib. In addition to the TalonSRX object, it also takes a reverseDirection boolean, which defines whether or not the encoder readings should be reversed. This could be used the way an encoder is mounted causes it to rotate in reverse when the robot is going forward.
That covers the primary constructor, but this class has multiple constructors. The other type of constructors also accept a WPI_TalonSRX object, which is an alternate implementation of the TalonSRX class that is compatible with many WPILib classes as it inherits from the SpeedController class. There's also a constructor version to not pass the reverseDirection parameter, which would result in the default value of m_reverseDirection staying at false.
Then there's the configure() function, which does some basic initialization, and is supossed to be called before the encoder is used. Inside that function, we call a function in the TalonSRX which sets the sensor to be the relative magnetic encoder. There's also an absolute encoder mode, which which acts more like a knob and tells you which position the encoder is in, while the relative mode makes it act like an incremental enocder, so the more turns the encoder turns, the higher it's value gets.
There's the setRawDistancePerRotation() function, which is used to set the ratio between a full rotation of the wheel and the distance travelled by the robot.
The other functions, such as setWheelDiameter() and setWheelRadius() do the same thing, and they just calculate the circumfurence.
the setGearRatio() defines the ticks per rotation. This is important because each rotation of the rotary encoder has a certian number of ticks(4096), and the rotary encoder isn't connected to the wheel directly but rather through a system of gears, so this function is used to set the m_ticksPerRotation variable. The rest of the functions are to get the values from the encoder, either in the form of the raw number of ticks or scaled with m_ticksPerRotation and m_distancePerRotation.
That's it for the intro, the rest of the code is explained in the subsystems and commands pages.